A Crash Course to Astrophotography in Peru
So you want to take your photography game to the next level? You want to visually explore the great mysteries that lie right above us and come away with beautiful photos to be proud of? Well in this article we aim to give you a crash-course guide to photograph the stars, and I’m afraid once you have been bitten by the astrophotography bug there is simply no going back, you will be addicted. There are a number of things to take into account when it comes to photographing the Milky Way and it starts way before you even touch the camera shutter, it goes from preparation, in-the-field shooting to post processing. In this article we will guide you through these steps from beginning to end.
1. Preparation
Preparation is key in shooting successfully in the field, how intensively you want to do this depends on the photo you want to take – some photographers will have a very specific image in mind and will do hours of research and wait months to come to a specific location for the one single night of the year they can obtain the precise composition they want.
For this kind of intensive planning, apps such as Photopills are the best and most complete ways to cover this. For those of you who aren’t as picky about the specific composition they wish to obtain there are fewer things to take into account whilst planning:
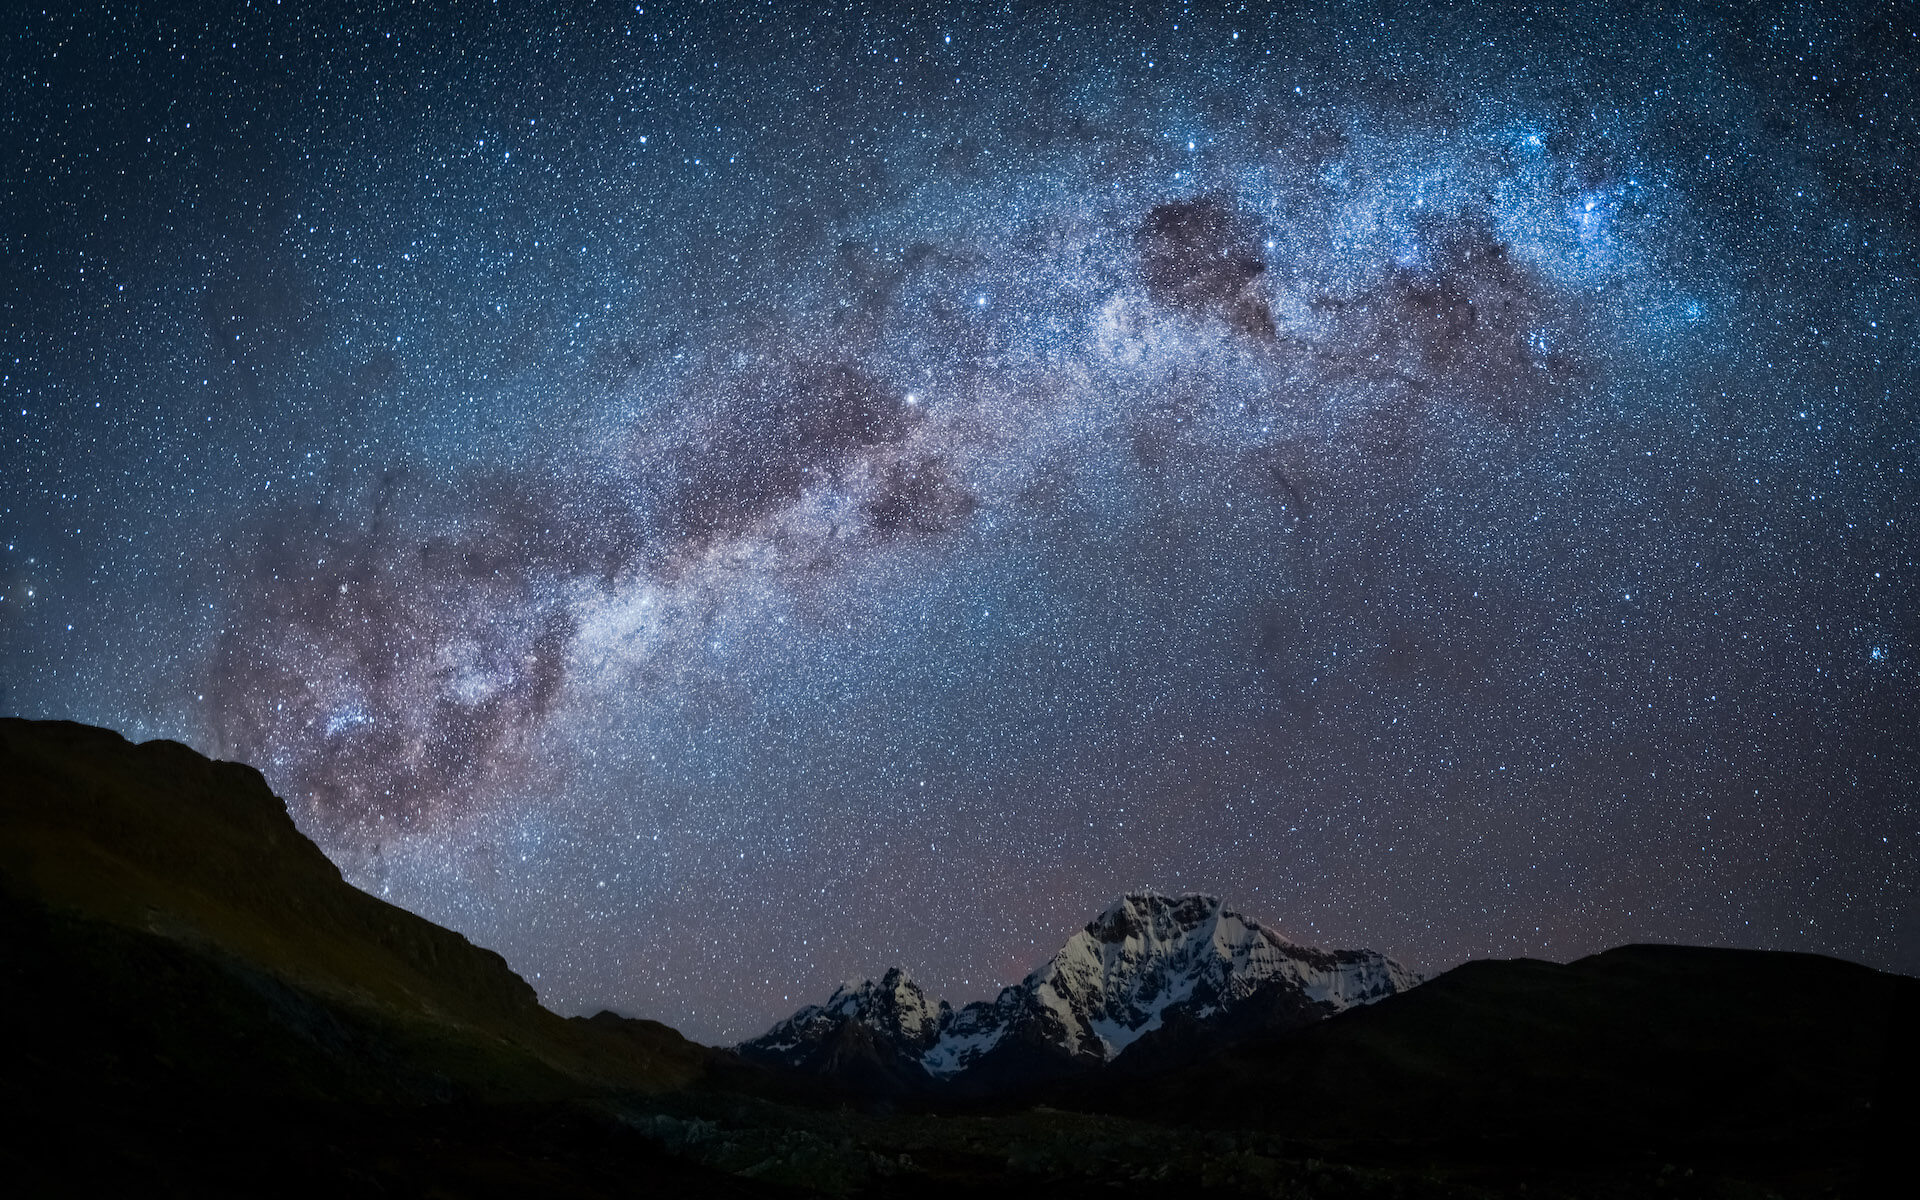
Firstly timing is very important. The time of year dictates whether the galactic centre is visible or not. The best time to photograph the Milky Way is generally thought to be from the middle of March through to mid-October, peaking around the June solstice time.
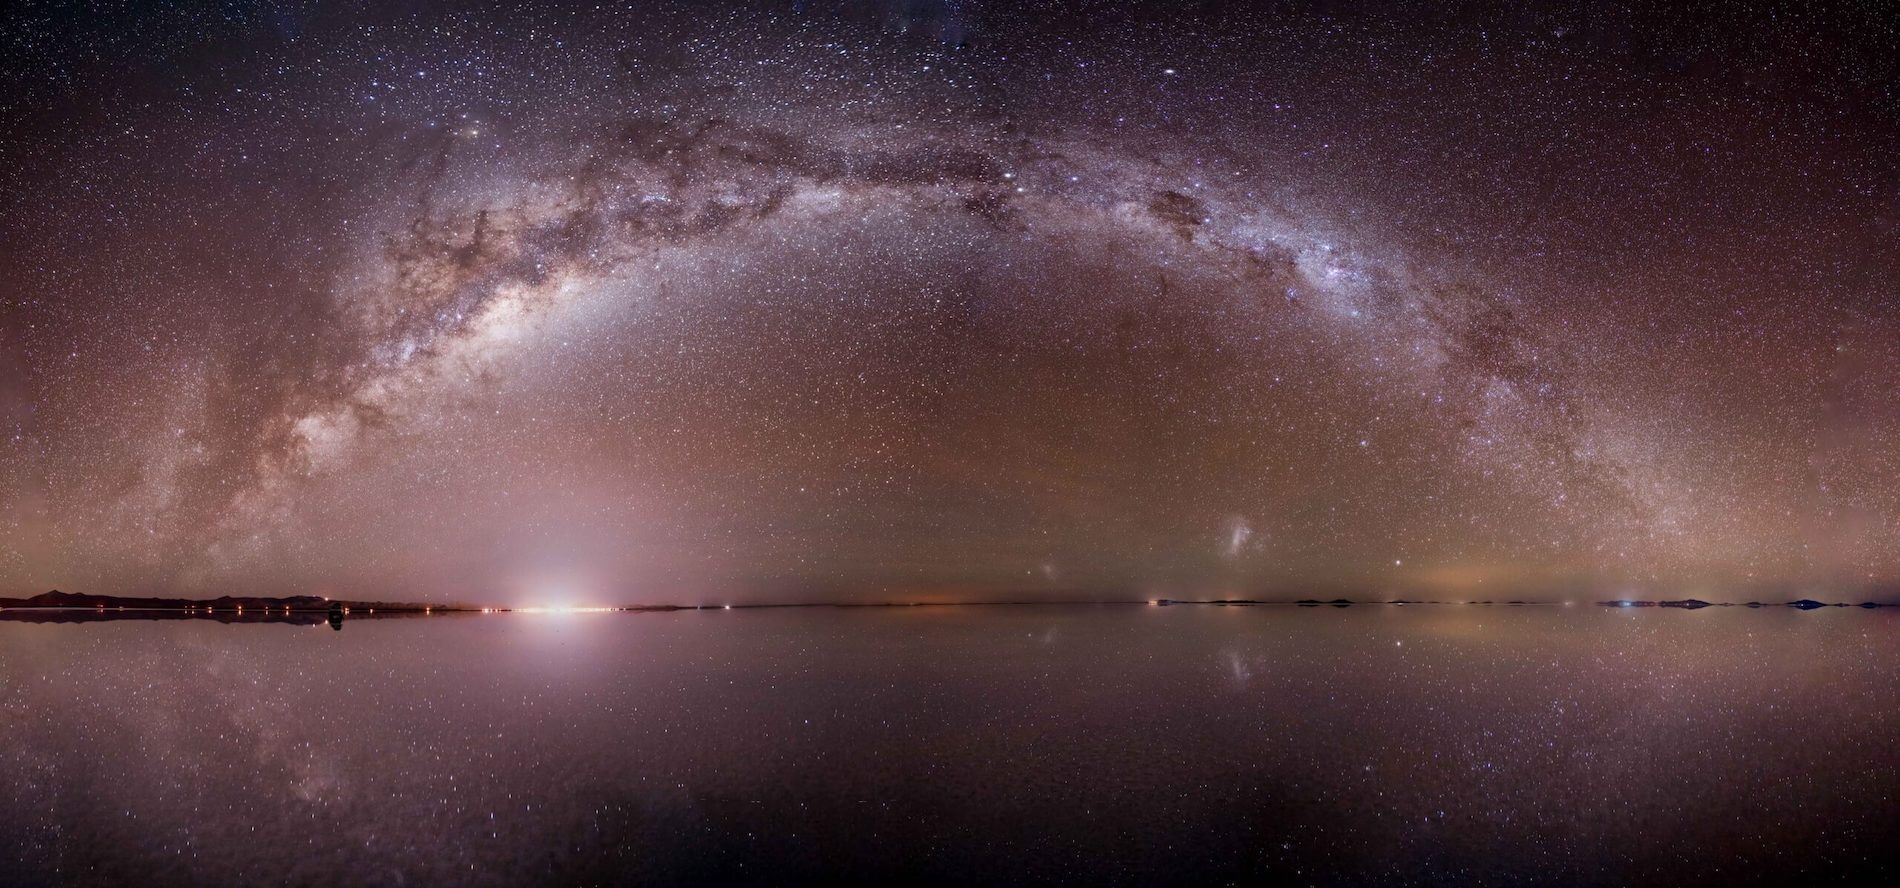
People generally aim to photograph the Milky Way during the new moon as this is when the sky is darkest; removing the bright light pollution of the moon allows the stars to be at their clearest and most visible. A few days before and after the new moon are also considered acceptable times to shoot as the moon itself is still very obscured meaning it gives off very little light. Don’t despair if the only chance you have to shoot is on a night with a visible moon, there can still be a window of opportunity to capture the stars after it gets dark if the moon rises later in the night!
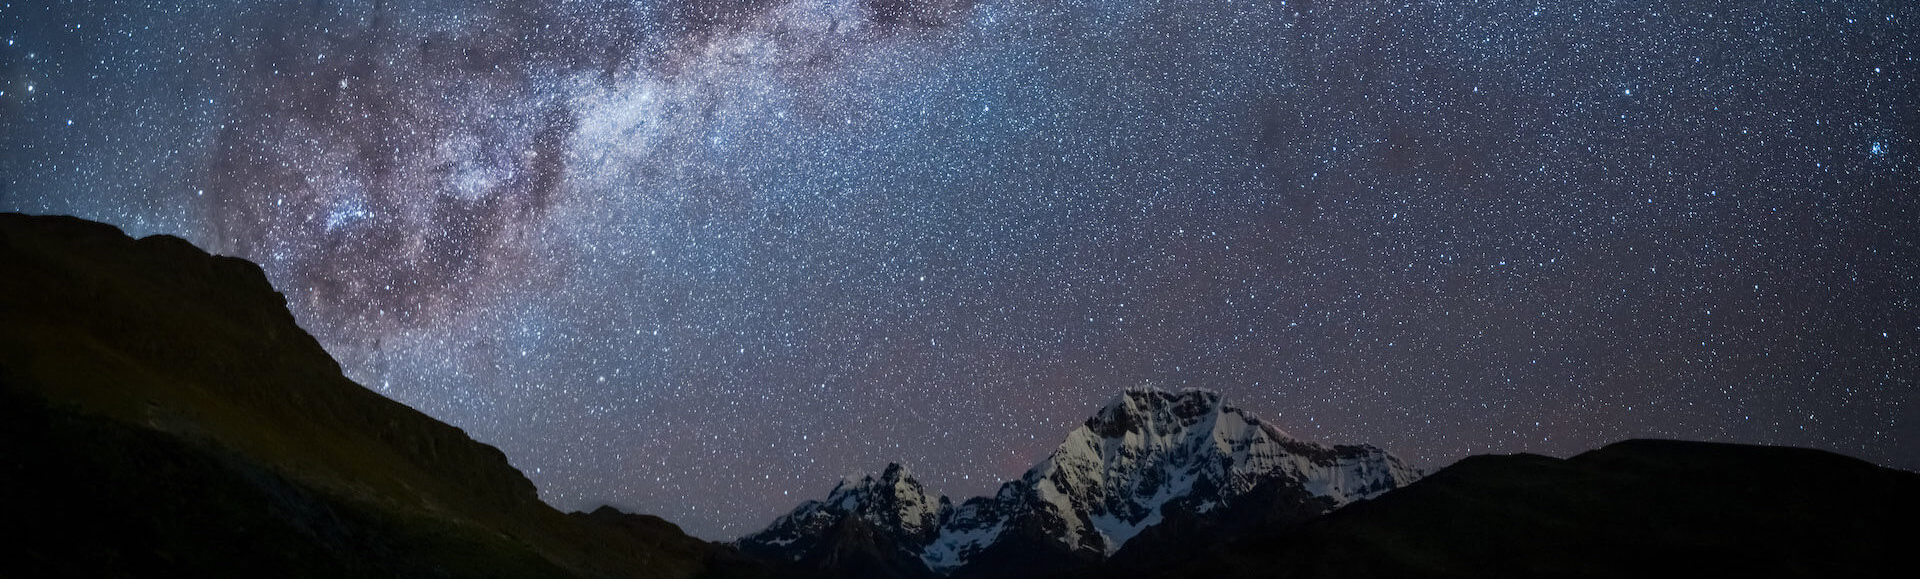
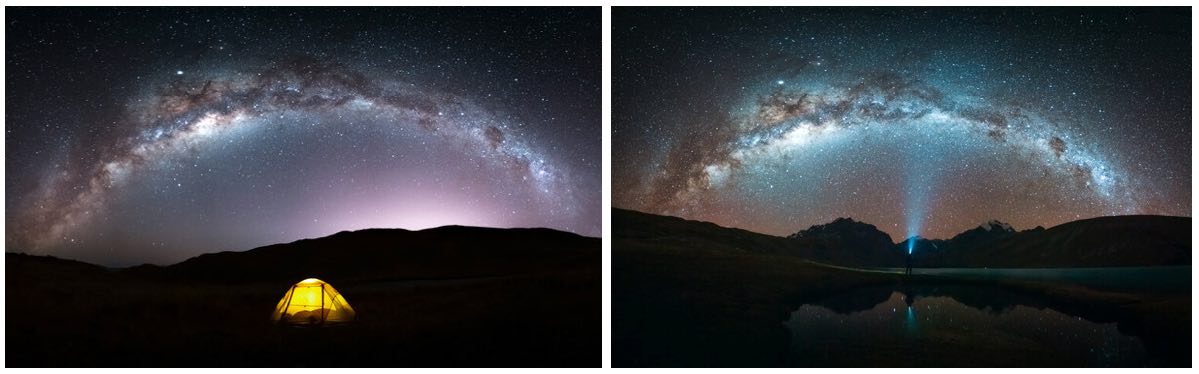
Location, Location, Location. Where you go to shoot the stars is incredibly important, light pollution from towns and cities will always ruin any star visibility so you must get to as remote a place as possible, there are dark sky maps available online that will show you the best areas to photograph with the least light pollution. For example here in Peru there are many amazing, remote areas far from any busy city or town where you can see a mind bending number of stars with just the naked eye, on our 7 Lagoons of Ausangate photo expedition in the Peruvian Andes surrounding Cusco we take our customers to spend a night in a small remote Andean village where we have a perfect opportunity to practise photographing the stars with incredible visibility.
Now if planning isn’t your cup of tea or it all seems a little too overwhelming do not despair! A photography tour is a great option to take all the planning and stress out of the equation. If you take an astrophotography tour, all the location scouting, timing and general legwork will be done for you, meaning you can simply turn up with your camera and photograph away under expert supervision. As mentioned before, here in Peru is the perfect place to photograph the stars for many reasons: the accessibility and frequency of extremely remote and rural areas far from light pollution, clear and cloudless nights are very frequent in the high altitude areas of the Andes mountains during the months of May to September, and being in the Southern hemisphere there is simply much more of the Milky Way visible as opposed to the Northern hemisphere, it’s really no wonder the Incas were such avid stargazers. Why need any other reason to visit Peru?
2. Shooting in the Field
So you have made all the preparations, you have found the perfect place away from any light pollution and arrived on the night of a new moon, you look up and see an incredible starry canvas stretched out before you. This is it; the moment you have been waiting for, but wait. How do you actually take the photo?! Fear not dear reader, I will show you how.
Equipment you will need to pull this off includes a camera that has high iso and long exposure capabilities, a suitable lens – wide lenses are an astrophotography favourite with as lower f stop value as possible; f2.8 or 3.5 or lower are most desirable. You will also need a sturdy tripod to keep your camera still during long exposures.
One of the most important and maybe trickiest parts is obtaining the correct focus, in this endeavour auto focus will simply not do; the camera will find it impossible in the dark. You must switch to manual focus, once here use your LCD screen instead of viewfinder (unless you use an electronic viewfinder then it will do the same job) increase your iso to a value high enough that the stars are visible on the screen, at this point use the zoom function to crop into the brightest star you can find to use as you basis for focus, now with this star visibly larger in your LCD screen pull that focus in manually using your focus ring until it is pin-sharp. Once you have this focus, set it and do not touch it, if you accidentally move your focus ring remember to repeat this process to ensure it is still sharp. It is tempting to skip this part and simply move your focus ring to the infinity position, just remember that this position is often not actually perfect focus and you could risk coming away from the shoot with shots that are soft and blurry, don’t risk it – do it right in the field.
Exposure settings are the next important part; you are shooting a very dark scene and must adjust settings to let as much light in as possible. Firstly your aperture should be set as wide as possible, this depends on your lens’ capability, often you will find astrophotographers shoot using f2.8 lenses, in this case they will set their aperture to f2.8. Next your iso settings need to be high (ew, right?) as much as every photographer hates using high iso values given the noise it adds to photos, there is no way around this unless you are using star tracking equipment (That’s one for another day) but for the purposes of this article, it is using a standard, non-moving tripod. So generally the iso values astrophotographers use will range between 3200 to 6400, this all depends on the camera and sensor, but in the field if you find you could bring exposure down at all from the shots you are taking then iso is the first thing I would lower. Lastly you will need to use a long exposure to let as much light in as possible, easy right? Not as easy as you think. Too long of an exposure can lead to star trailing dependant on your focal length, which leads us to our next point.
The 500 rule. This is a rule of thumb that any astrophotographer uses in order to get the longest exposure time possible without star trails and blur, we all want pin-sharp photos, right? Given that the longer your focal length the more magnified movement is, it means your exposure time would be significantly shorter when shooting at 100mm as opposed to 16mm before trailing occurs. The basic premise is you need to divide 500 by your focal length to get your maximum shutter speed. The equation goes like this:
Shutter Speed = 500 / Crop Factor x Focal Length
For those shooting full frame sensors the Crop Factor is simply 1 and can be ignored, for those on a crop sensor use 1.6 (or 1.5 – depending on your camera sensor) as the crop factor. To put this practically, if I am shooting on my full frame Sony A7Riii at 35mm the equation would look like this:
500 / 1 x 35 = 14.3
In this situation my maximum shutter speed would be 14 seconds before trailing appeared. Lastly, an important thing to remember is that the 500 rule is simply a guideline, don’t forgo common sense and what is in front of your eyes in its place; this means check all your photos every time to make sure the stars look sharp and if not make adjustments accordingly, whether that’s the focus or the shutter speed.
3. Post Processing
Still with us? Congratulations! You have a photo of the stars. But what!? It looks dull, grainy and lifeless; nothing like the awe-inspiring astro photos you see your favourite photographers sharing.
Well, dear reader, in come the joys of post-processing; the edit you make can and will make all the difference between a good photo and a great photo. Now this is only a crash course so I will not go too far down the rabbit hole of Milky Way post-processing as, believe me, it can go deep. Instead I will share with you a few of my favourite simple tips to make your Milky Way shot pop.
Firstly you will need some editing software, Lightroom is a firm favourite for a large percentage of photographers but there are plenty of great alternatives out there too.
Colour balancing is one of the first and most important things, often you will find your RAW photos have strange colours, often reddish hues to them, all this can be dealt with using temperature and hue sliders in post. The first thing a lot of photographers will do is cool the photo right down to give it a nice, cold night blue tone, one that is desirable for a lot of astrophotographers. Sometimes doing so can introduce other hues into the photo that you did not intend for, so counter adjustments can be made using the green/purple hue slider. Play around with these for a while to balance it out and find a look that you like, feel free to be creative!
Making the Milky Way pop is important to making the image eye catching and is simple enough to do, your best friend here is the adjustment brush. Paint over the Milky Way with the brush tool to make local area adjustments, try increasing the exposure and/or whites a splash, add some clarity and increase the contrast to make the Milky Way instantly stand out.
Lastly noise reduction is a god-send in helping clear up those high-iso, grainy shots. In Lightroom, under the ‘Noise Reduction’ panel there are 3 main sliders I would recommend in cleaning up the grain of an image: the ‘Colour’ slider helps even out areas of odd, non-uniform colour pixels which can make the image look awfully untidy, adjust this alongside the ‘Smoothness’ slider to dramatically reduce the blotchy colour issues you will most likely find. The ‘Luminance’ slider will smooth everything over and help ease the grain, but beware, use tastefully as overdoing this slider can make the image look strange and almost cartoonish, a sweet spot for this would be around 25 to 40. You can use the ‘Detail’ slider under ‘Colour’ to try to bring a little more detail back into the shot but again, use with caution!
This concludes our quick guide to shooting the Milky Way, now it is down to you to head out and reap the rewards of photographing the stars!
We’ll see you around!
The Andean Team